How To Log In and Transfer Files with Globus
This step-by-step guide will show you how to log into Globus and use it to transfer files reliably and securely. You will become familiar with basic Globus concepts and interfaces, and begin to experience how Globus can help you spend more time on your research and less time on data management.
If you or your organisation already have an existing identity on Globus please disregard the section “Set up and use Globus Connect Personal” and skip to Login in with an existing identity.
Set up and use Globus Connect Personal.
- Follow these instructions to download Globus Connect Personal and set up an endpoint and collection on your own Mac, Linux, or Windows system.
- Navigate to the File Manager page and request a transfer between your new collection and EMBL-EBI Public endpoint. Here is a link to the HGNC path within the File manager.
- Navigate to the Activity page and review your transfers.
You don’t need administrative privileges on your system to install Globus Connect Personal. Transfers to and from your system won’t fail if you shut your system down or disconnect from the network. Instead, transfers will be suspended and they’ll automatically resume when your system comes back online. Once you have this setup, skip to the Request a file transfer section.
Log in with an existing identity
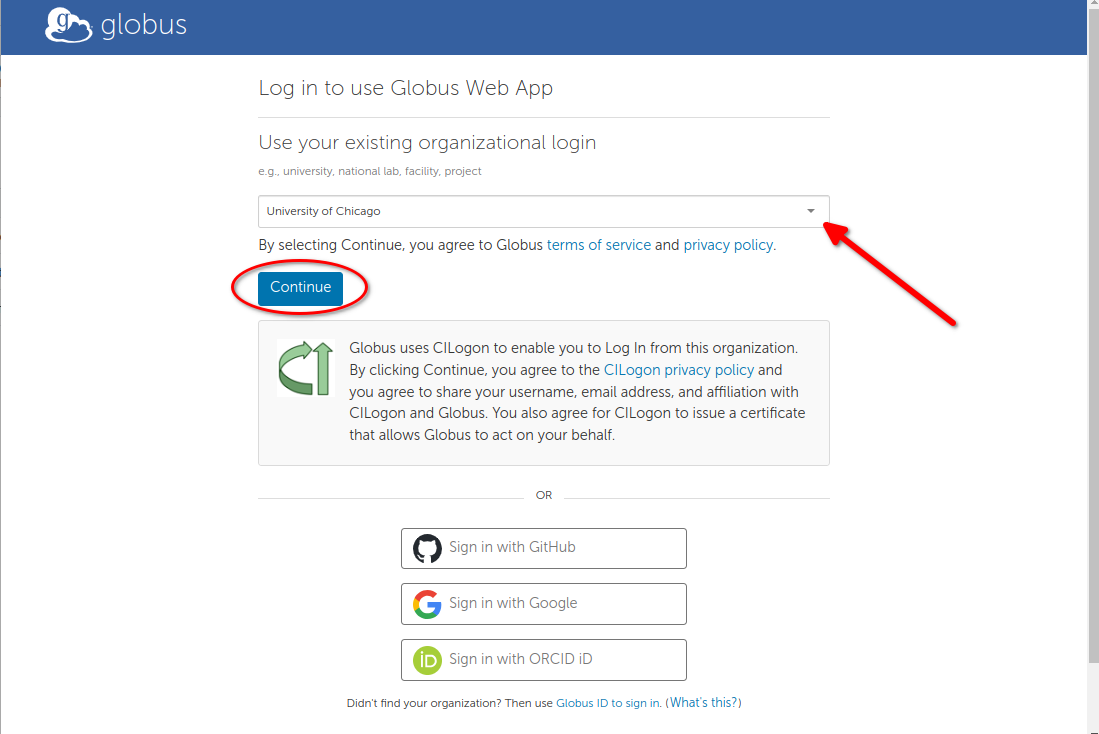
Visit www.globus.org and click “Login” at the top of the page. On the Globus login page, choose an organisation you’re already registered with, such as your school or your employer. (Try typing a few letters of your organisation’s name to narrow the list.) When you find it, click “Continue”. If you can’t find your organisation in the list, you can use Google, ORCID, or Globus ID, all three of which allow you to create new accounts if you don’t already have one.
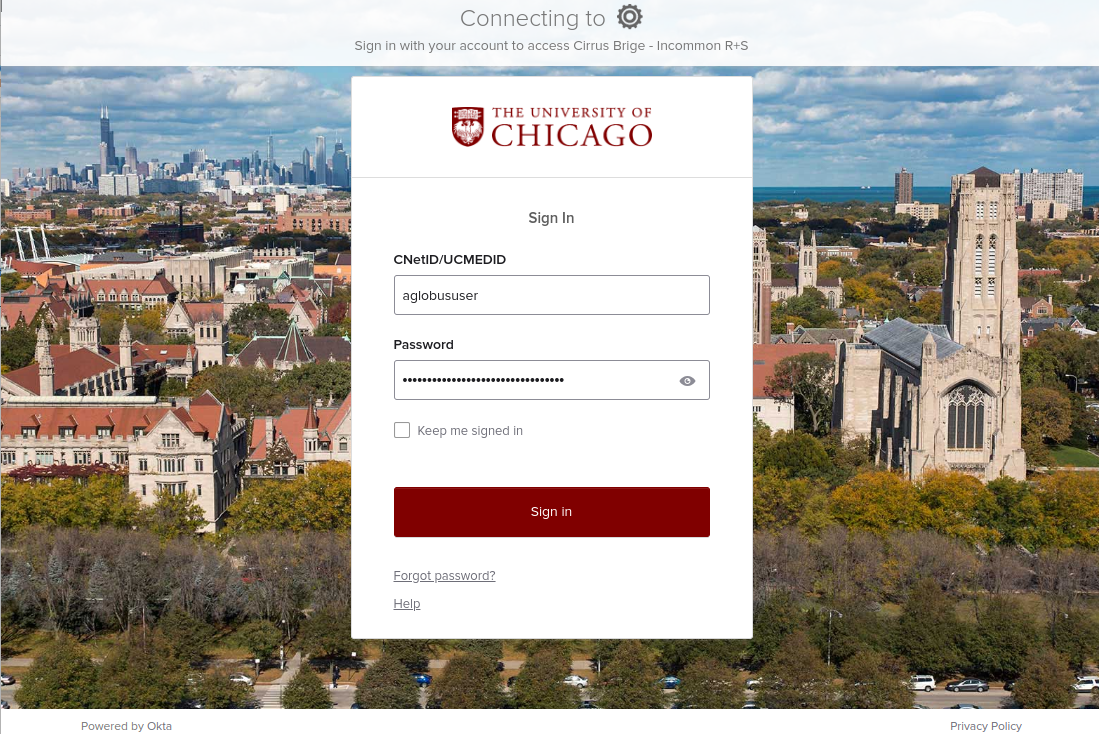
You’ll be redirected to your organisation’s login page. Use your credentials for that organisation to login. (The example below shows the University of Michigan’s login page.)
Some organisations will ask for your permission to release your account information to Globus.
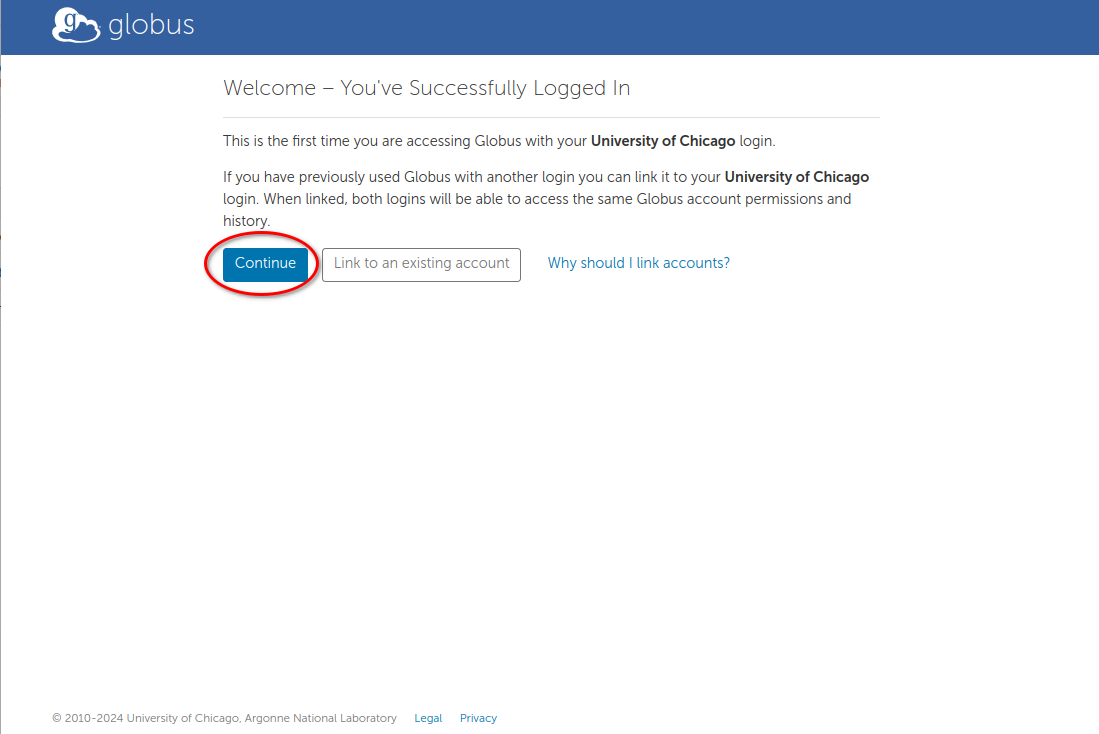
Once you’ve logged in with your organisation, Globus will ask if you’d like to link to an existing account. If this is your first time logging in to Globus, click “Continue”. If you’ve already used another account with Globus, you can choose Link to an existing account.
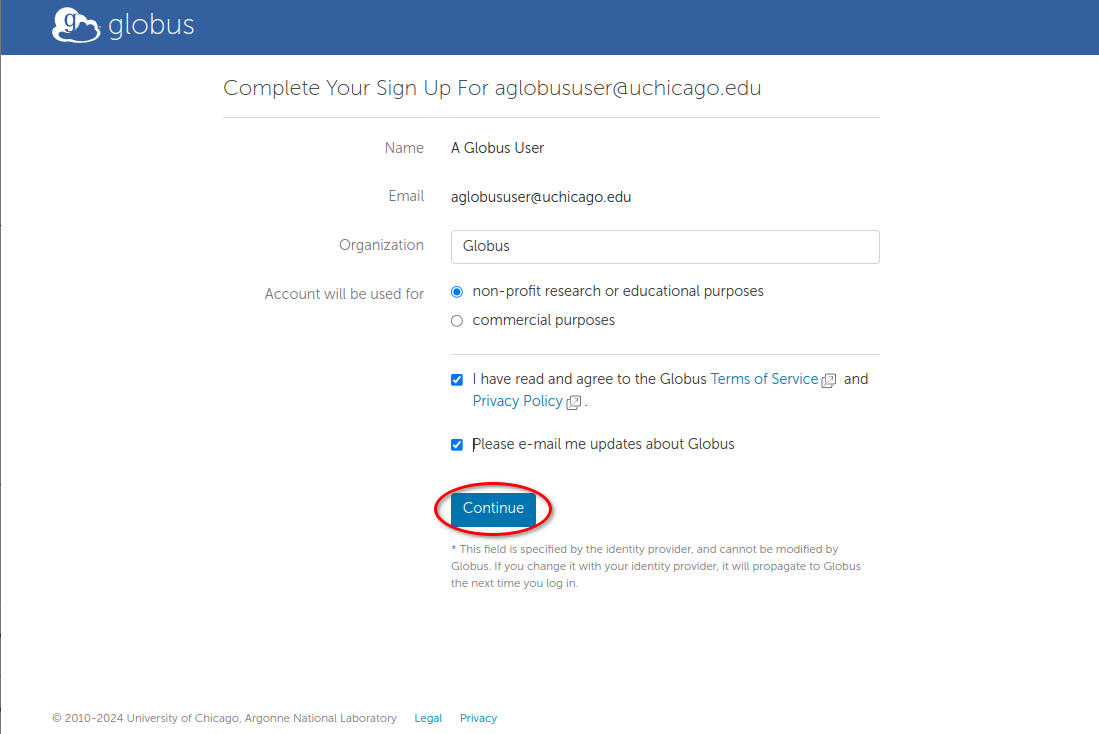
You may be prompted to provide additional information, such as your organisation and whether or not Globus will be used for commercial purposes. Complete the form and click “Continue”.
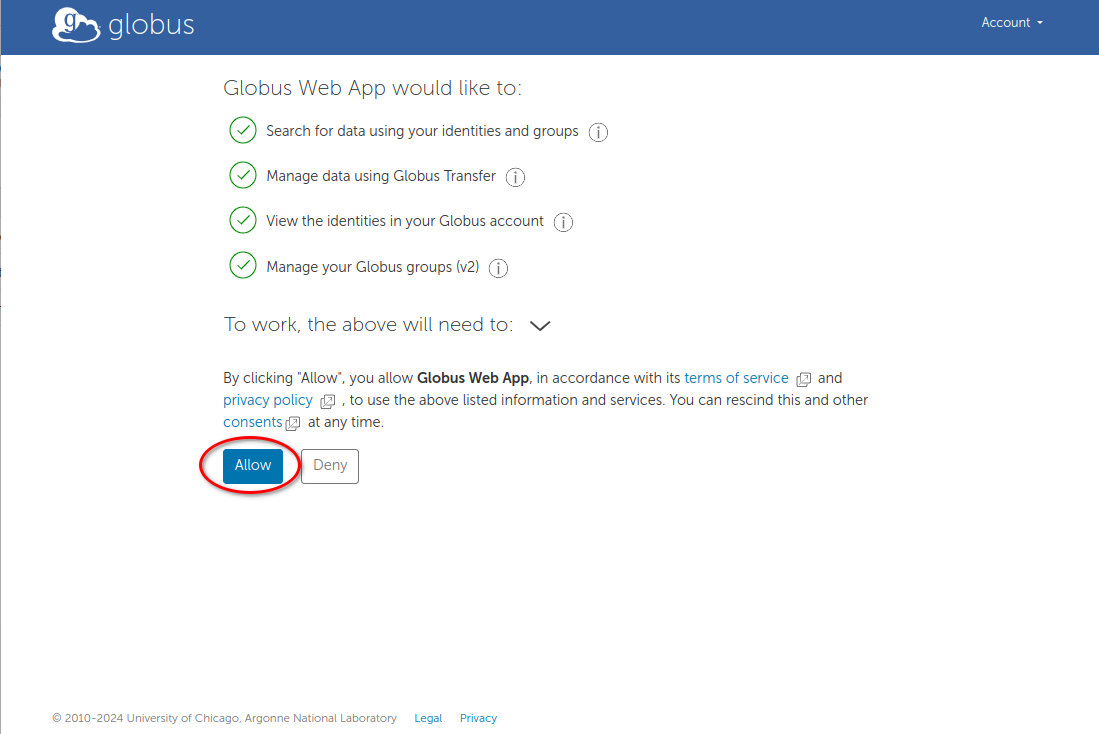
Finally, you need to give Globus permission to use your identity to access information and perform actions (like file transfers) on your behalf.

The File Manager
After you’ve signed up and logged in to Globus, you’ll begin at the File Manager.

The first time you use the File Manager, all fields will be blank.


Access a collection
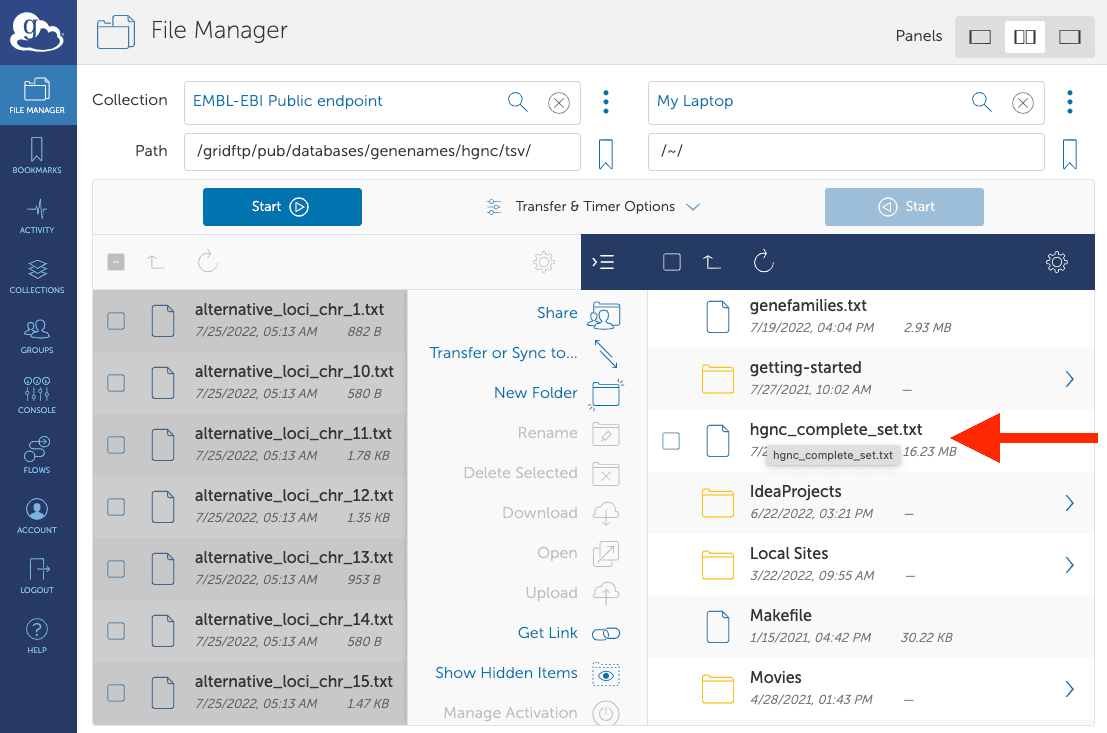
Click in the Collection field at the top of the File Manager page and type “embl-ebi pub”. Globus will list collections with matching names. The collection EMBL-EBI Public Endpoint is a collection administered by EMBL-EBI for publically accessible files and is free to use for all Globus users without further authentication.
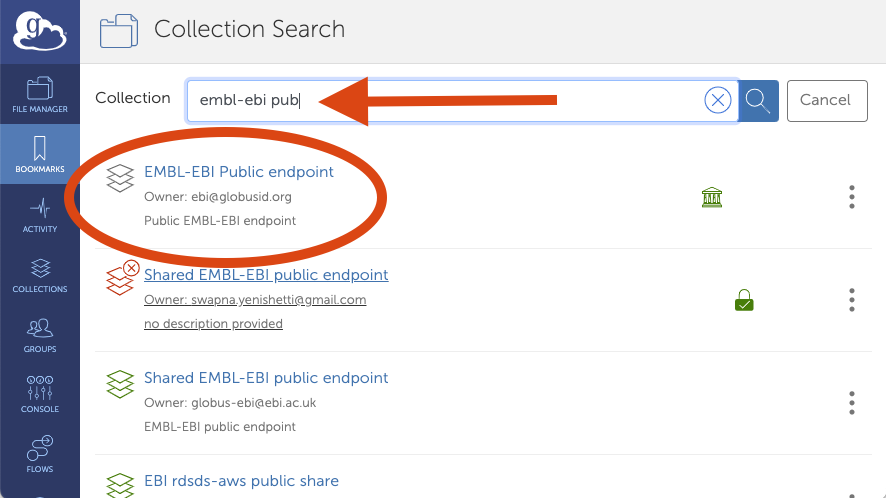 

Click on EMBL-EBI Public Endpoint. Globus will connect to the collection and display the default directory, /~/. (It will be empty.) Click the “Path” field and change it to /gridftp/pub/databases/genenames/hgnc/. Globus will show the directories in the new path of archive, csv, json and tsv. For the purposes of this exercise double click on tsv, this opens the directory and shows tab separated variable (tsv), text files.
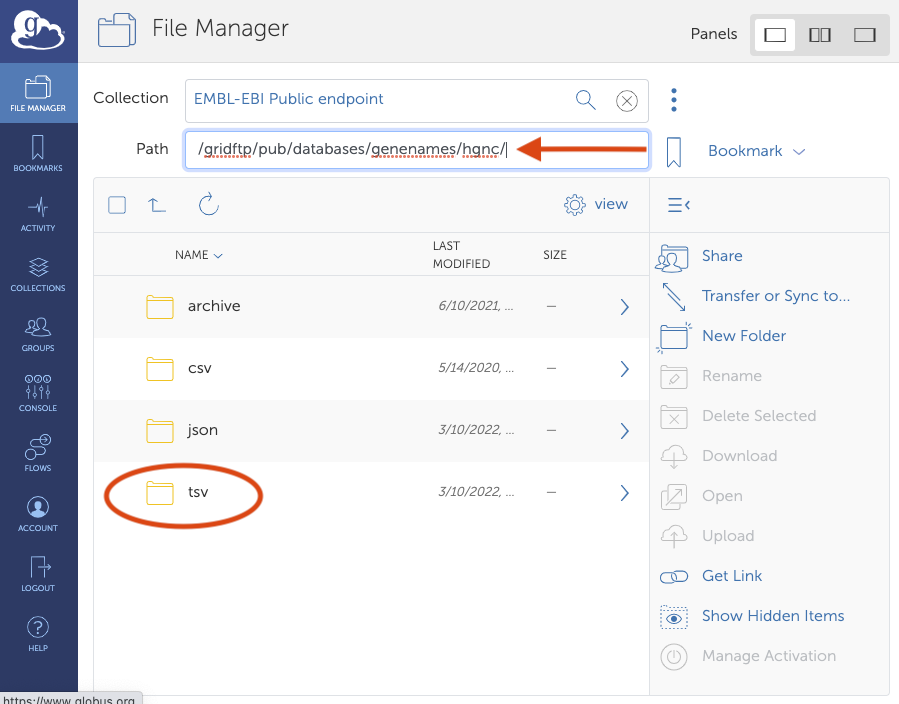
Click on hgnc_complete_set.txt file to say that you want the HGNC complete gene symbol data set.
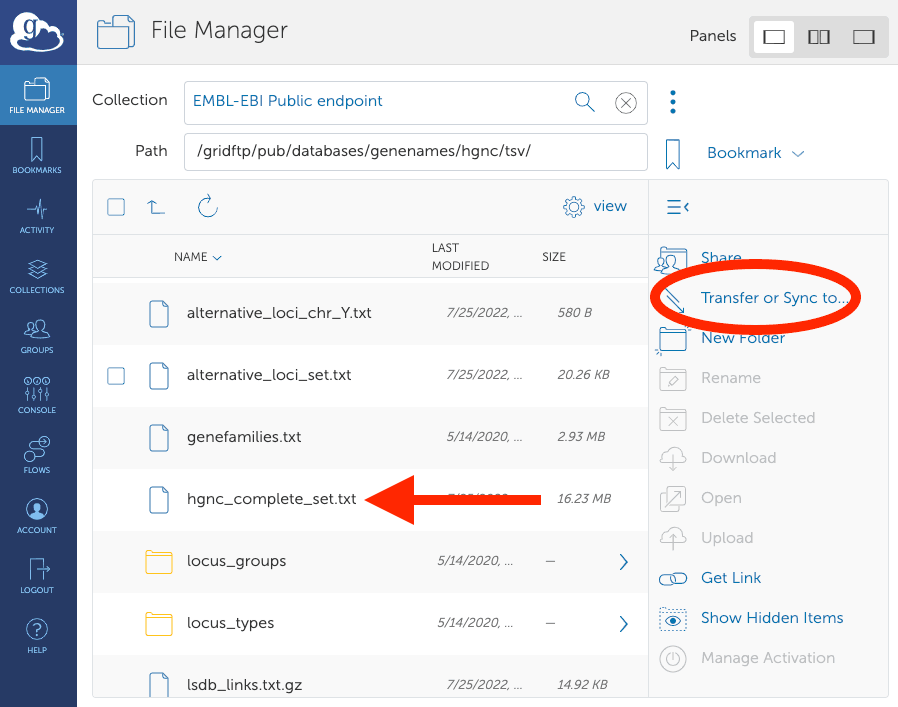
Request a file transfer
Click Transfer or Sync to… in the command panel on the right side of the page. A new collection panel will open, with a “Search” field at the top of the panel.
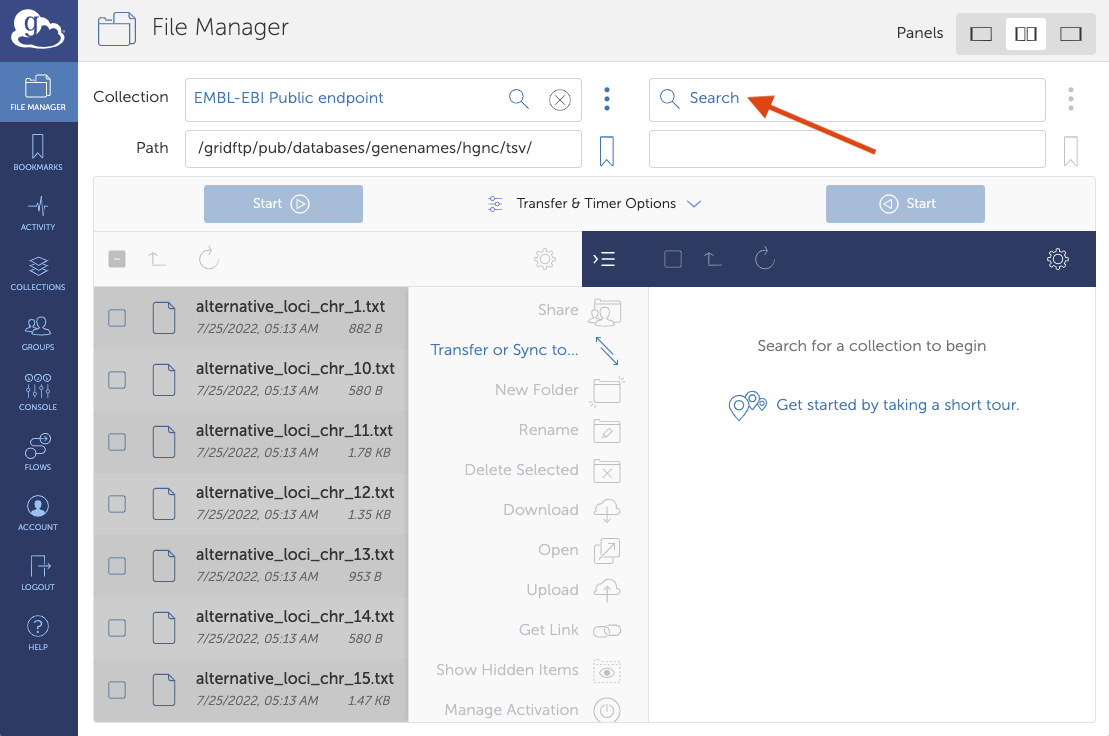
Find your organisational or personal collection and connect to it as you did with the EMBL-EBI Public Endpoint above. Your goal is to transfer the hgnc-complete file here. The Start> button will be active .
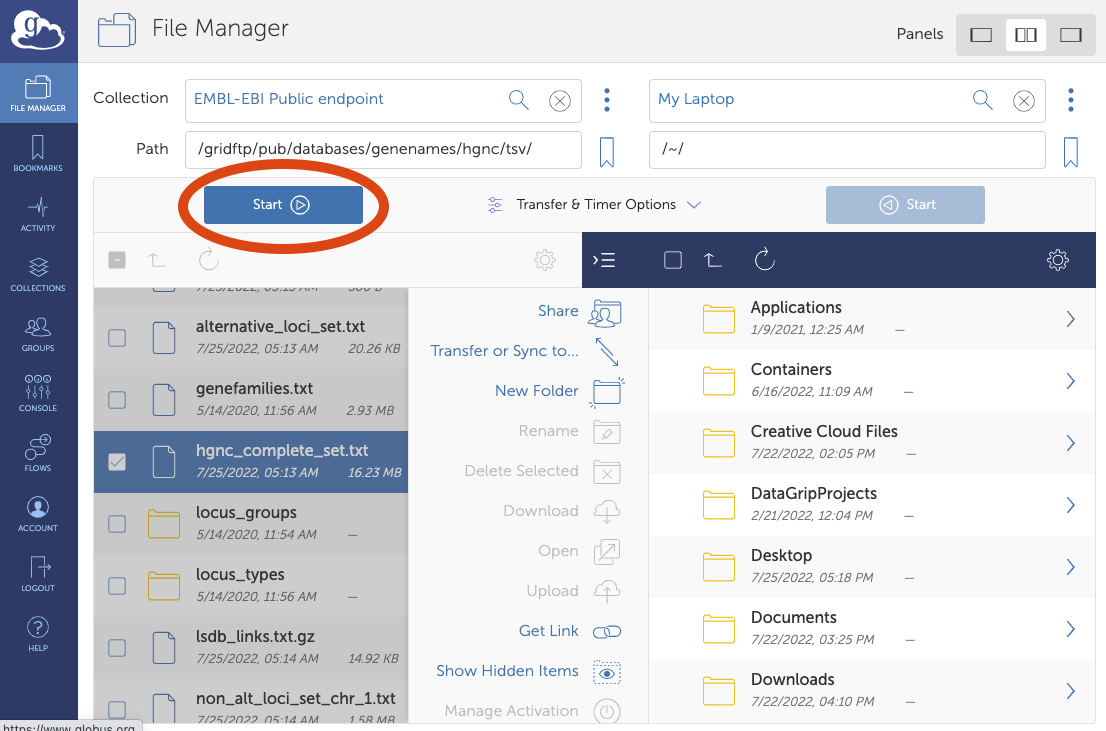
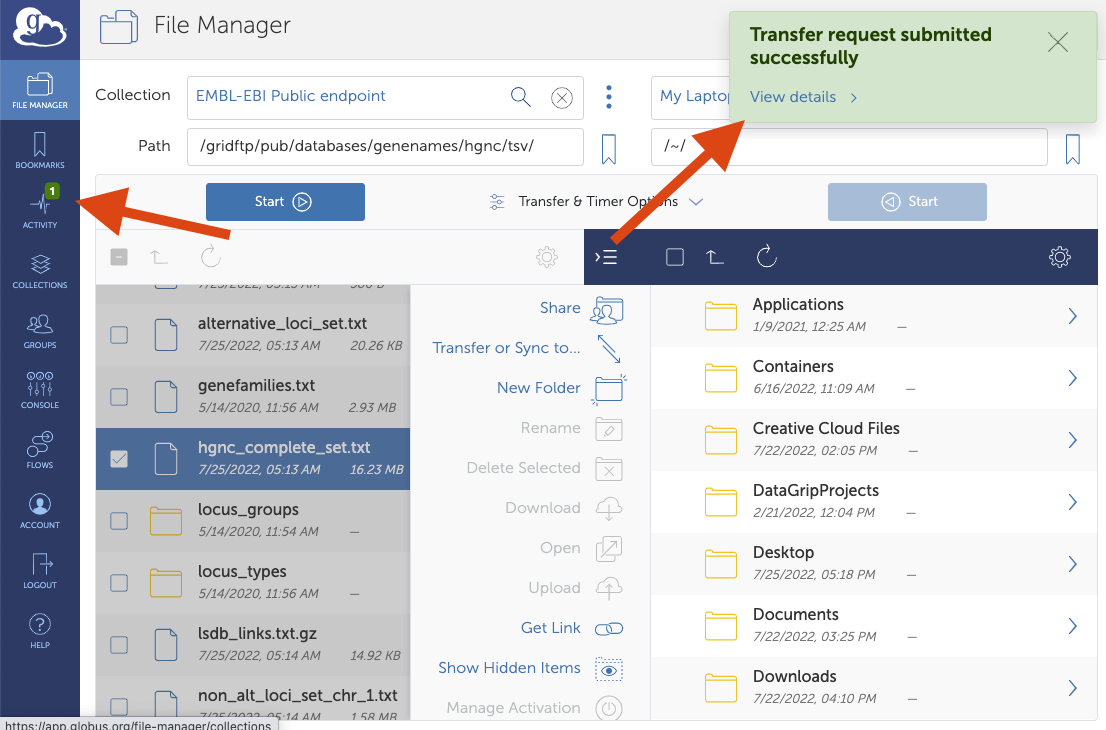
Click the Start> button to transfer the selected files to the collection in the right panel. Globus will display a green notification panel— confirming that the transfer request was submitted— and a badge to the Activity item in the command menu on the left of the page.
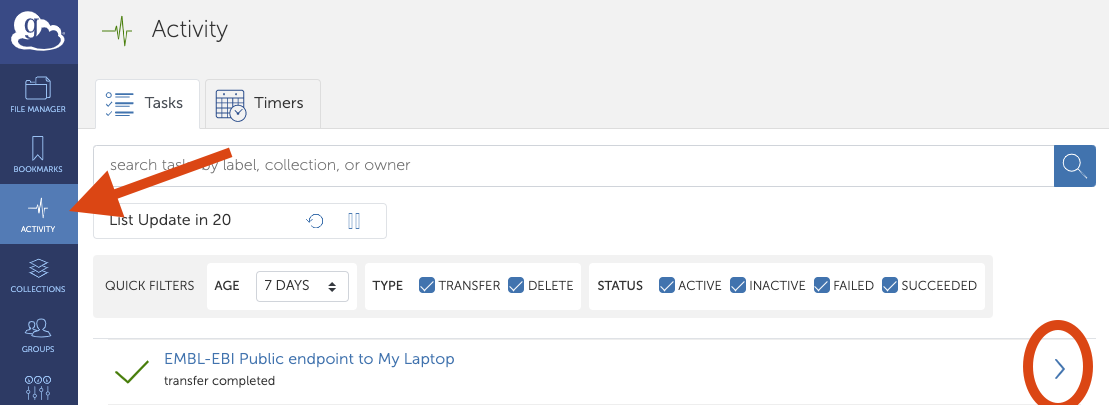
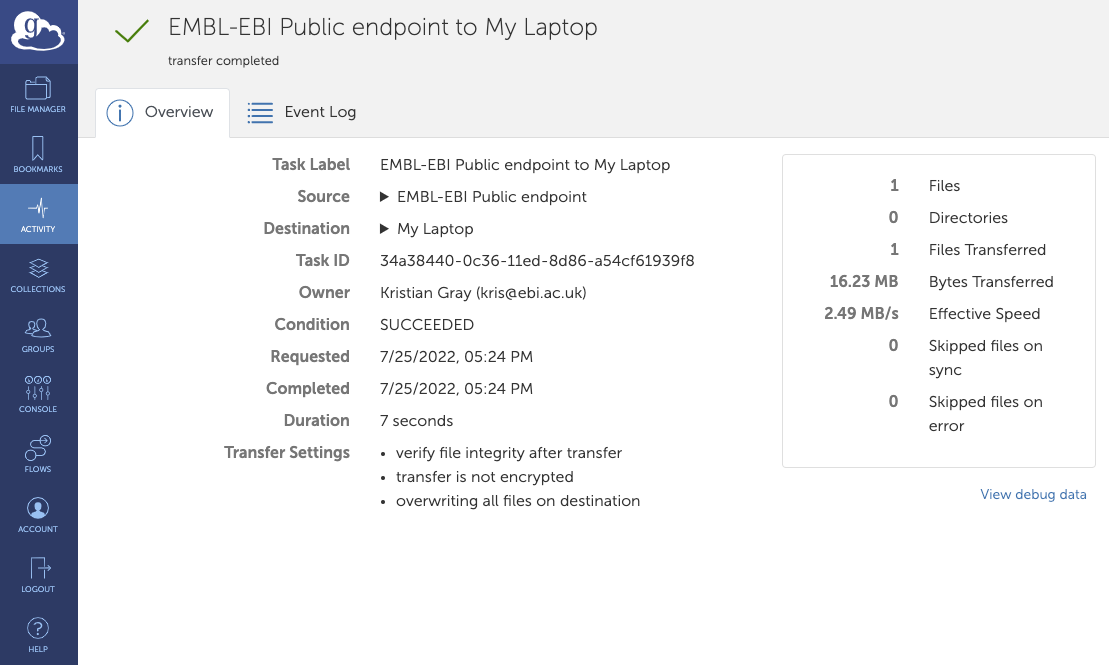
Confirm transfer completion
The transfer will complete quickly. Click Activity in the command menu on the left of the page to go to the Activity page. On the Activity page, click the arrow icon on the right to view details about the transfer. You will also receive an email with the transfer details.
Click File Manager in the command menu on the left of the Activity page to return to the File Manager. The collections you were viewing before will reappear. You may notice that the transferred files are not listed in the right panel with your collection and the /~/ path, even though the transfer has completed. Click the refresh icon (circular arrows) at the top of the collection panel to see the updated contents.


Click File Manager in the command menu on the left of the Activity page to return to the File Manager. The collections you were viewing before will reappear. You may notice that the transferred files are not listed in the right panel with your collection and the /~/ path, even though the transfer has completed. Click the refresh icon (circular arrows) at the top of the collection panel to see the updated contents.